
Manage matrices
About AFA matrices
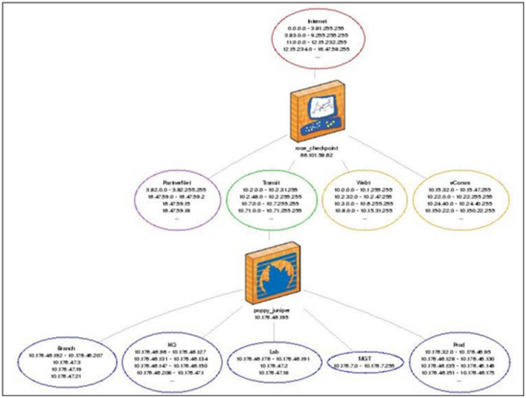
A matrix is a set of devices, in which information about each device member's position in the network hierarchy is provided.
When you create a matrix, AFA uses a special algorithm to calculate the relationships between the members. If desired, you can override the results and edit the topology information.
Note: In a Geographic Distribution architecture, matrices may contain devices that are managed by different remote agents.
When a report is generated for the matrix, AFA analyzes the devices' multi-tiered network topology and enables you to do the following:
- View a network diagram of the device members' topology, including the connections between them.
- View risks associated with traffic that is allowed across all devices in the matrix.
- Run a traffic simulation query on the generated matrix analysis report.
Add matrices
Do the following:
-
Access the Devices Setup page. For details, see Access the DEVICES SETUP page.
-
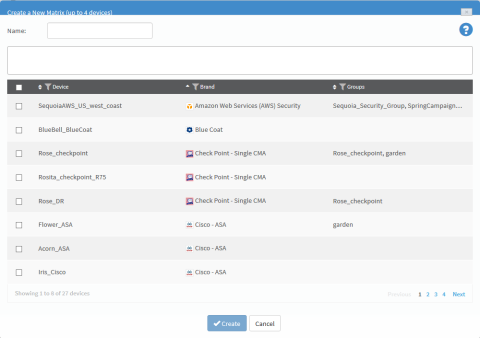
Click New, then click Matrix.
The Create a New Matrix dialog box appears.
-
In the Name field, type the name of the new matrix.
-
Select the devices that you want to add to the matrix.
You can search for devices by typing the full or partial name of a device into the box.
You can browse the list by clicking Previous or Next below the list. Additionally, you can see more devices on the same page by expanding the size of the dialog box by pulling the bottom corner. You can filter the devices by Device, Brand and Group by clicking
 beside the column title.
The devices appear in the members box.
-
To remove members from the matrix, clear the device's check box.
The device is removed from the members box.
Note: A matrix must include 2-4 members.
-
Click Create.
A message box appears asking whether you want to customize the matrix settings.
-
Do one of the following:
- To customize the matrix's topology at a later time, click No.
- To customize the matrix's topology now, do the following:
-
Click Yes.
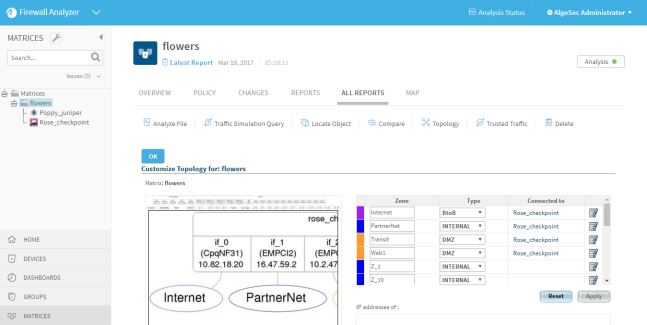
The Customize Matrix Topology page appears, enabling you to edit all zones in the matrix's multi-tiered topology.
-
Customize the matrix topology.
-
Click OK.
Edit matrices
Do the following:
-
Access the Devices Setup page. For details, see Access the DEVICES SETUP page.
-
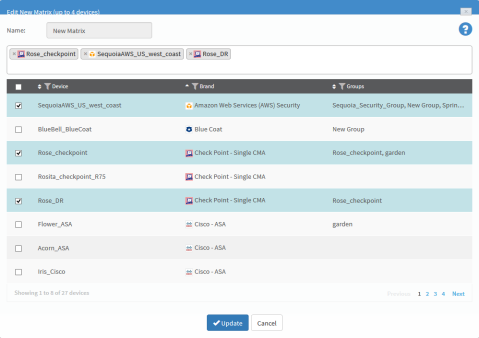
Select the desired matrix and click Edit.
The Edit Matrix dialog box appears.
-
To add a member to the matrix, select to desired device.
You can search for devices by typing the full or partial name of a device into the box.
You can browse the list by clicking Previous or Next below the list. Additionally, you can see more devices on the same page by expanding the size of the dialog box by pulling the bottom corner. You can filter the devices by Device, Brand and Group by clicking
beside the column title.The devices appear in the members box.
-
To remove members from the matrix, clear the device's check box.
The device is removed from the members box.
Note: A matrix must include 2-4 members.
-
Click Update.
A success message appears.
-
Click OK.
A message box appears asking whether you want to customize the matrix settings.
-
Do one of the following:
- To customize the matrix's topology at a later time, click No.
- To customize the matrix's topology now, do the following:
-
Click Yes.
The Customize Matrix Topology page appears, enabling you to edit all zones in the matrix's multi-tiered topology.
-
Customize the matrix topology.
-
Click OK.
Rename matrices
Do the following:
-
Access the Devices Setup page. For details, see Access the DEVICES SETUP page.
-
Select the desired matrix and click Rename.
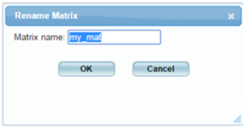
The Rename Matrix dialog box appears.
-
In the Matrix name field, modify the matrix name as desired.
-
Click OK.
A success message appears.
-
Click OK.
Delete matrices
Do the following:
-
Access the Devices Setup page. For details, see Access the DEVICES SETUP page.
-
Select the desired matrix and click Delete.
A confirmation message appears.
-
Click OK.
A success message appears.
-
Click OK.
The matrix is deleted.
