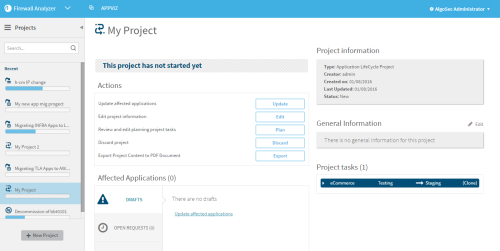
This topic describes how to create a AppViz application lifecycle project. For more details, see Projects and Manage projects.
Note: You can save and close the plan at any point. For details, see Save an incomplete plan.
Plan your project to determine the changes that occur as the related applications move between lifecycle stages.
At each stage:
- Applications defined with Move actions will be changed as defined when the application enters the target phase.
- Applications with Clone actions are duplicated, and the change is applied to the duplicate instead. The original application is not affected.
Do the following:
-
View the project you want to plan. For details, see Projects.
-
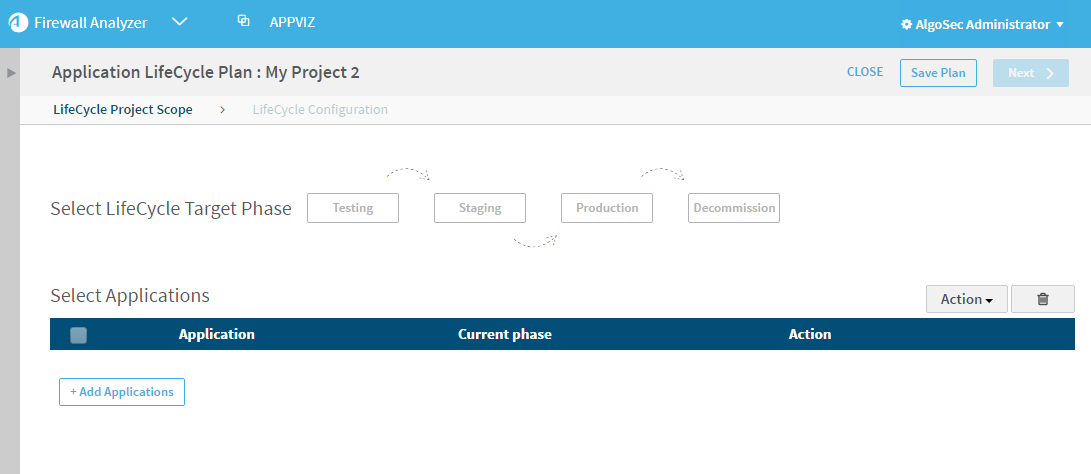
In the Actions area, click Plan.
The Application LifeCycle Plan page appears in the LifeCycle Project Scope stage.

-
Define the changes that you want to occur as the related applications move between lifecycle phases:
-
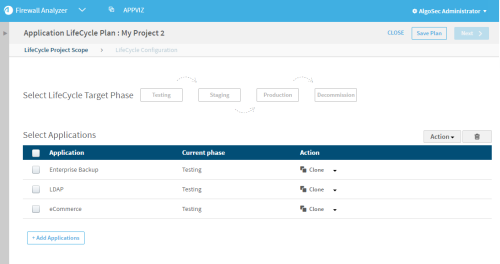
Select a Target Phase. The changes you specify in the next steps occur when the application moves into this phase.
-
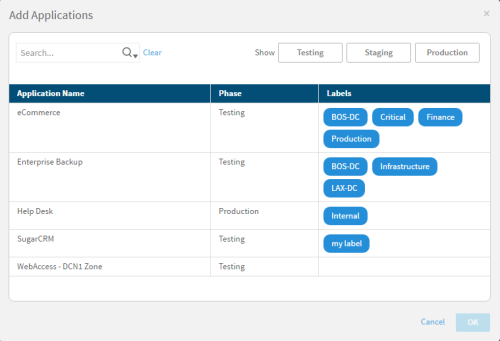
Click + Add Application, and select the applications you want to add to the project.
For example:
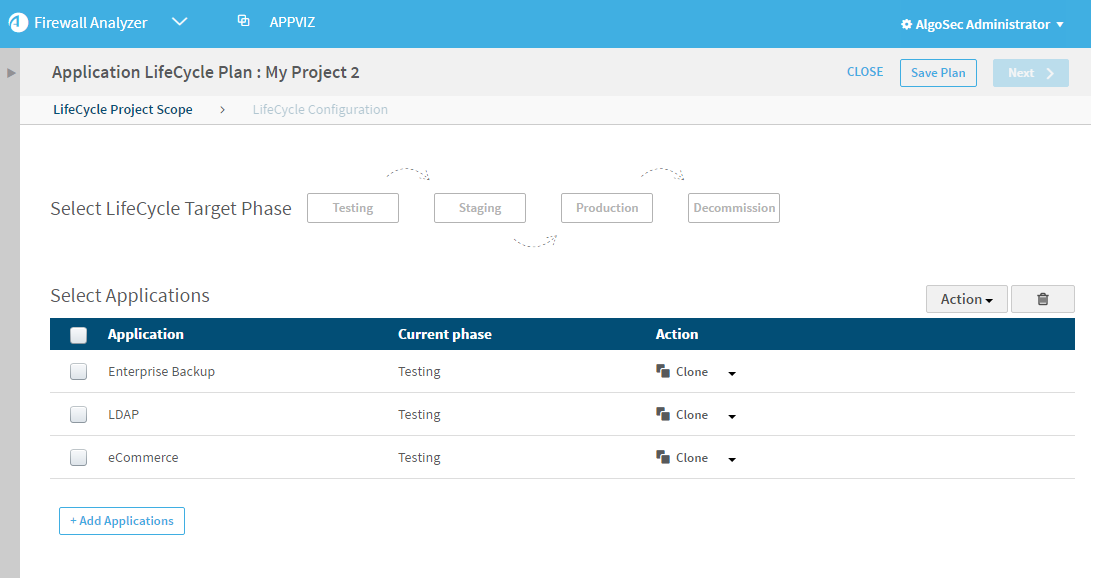
The selected applications appear in the Application Lifecycle Plan page assigned the default action, Clone.
For example:
For more details, see Business applications.
-
Assign an action for each application by doing one of the following:
- Select an action for a single application from the Action column.
-
Use the checkboxes to select one or more applications.
Click
 and select an action to apply to all selected applications.
Note: To remove an application, use the checkbox to select one or more applications, and then click
 .
.
-
-
Do one of the following:
- For the Decommission phase, skip to the last step to complete the planning.
-
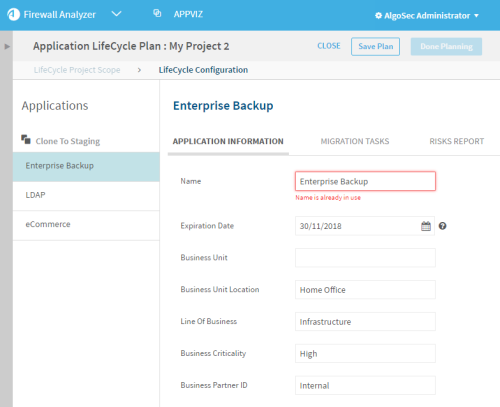
For all other phases, click Next. The Application Lifecycle Plan page appears in the LifeCycle Configuration stage. The selected applications appear in the left panel, sorted by their Action.
For example:
-
Define the APPLICATION INFORMATION fields for each application configured.
Select the application on the left, and then define values for the following fields:
Name
Enter a name for the application.
Note: When cloning applications, you must change the name of the application.
Expiration Date
Click the calendar icon to select an expiration date.
Note: Expiration date may be modified in edit mode.
Business Unit
Type the name of the business unit.
Business Unit Location
Type the name of the business unit location.
Line Of Business
Type the line of business.
Business Criticality
Type the criticality of the business.
Business Partner ID
Type the ID of the business partner.
-
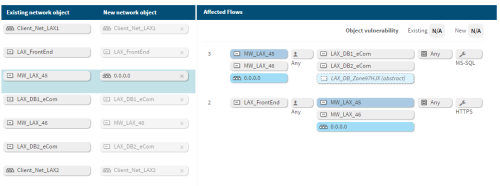
Click the MIGRATION TASKS tab and configure migration tasks for each of the applications defined.
For each application, click the field in the New network object column, and do one of the following:
- Select Keep existing object
- Enter the name of a new network object
- Use the Network Object Lookup wizard to select an existing network object or create a new one. For details, see Use the network object lookup wizard.
As the assignments are made for each new network object, the affected flows appear in the Affected Flows column. The relevant network objects appear in blue, and the new and exiting object vulnerability scores appear with the flows. For example:
-
View risk details for each application defined.
Click the RISKS REPORTS tab, where AppViz displays risk information retrieved from AFA that is relevant to the new network objects.
Note: You must specify the migration tasks for each object in the Migrations Tasks tab before accessing the Risks Report tab.
-
Note: This option is only enabled once all objects have been assigned.
The project's page appears, displaying the Project Tasks and each task's details.