
Manage custom fields
This topic describes how to manage FireFlow custom fields.
FireFlow custom field types
Tip: You can edit, disable, configure the order of, and configure roles' permissions for custom or FireFlow fields.
For more details, see Manage user permissions.
You can define custom fields and add them to change requests, users, or user roles throughout the FireFlow user interface. For example, you can add a budget number field in change requests or an extension number field for users. In addition, it is possible to add custom fields to traffic change request traffic fields or object changes.

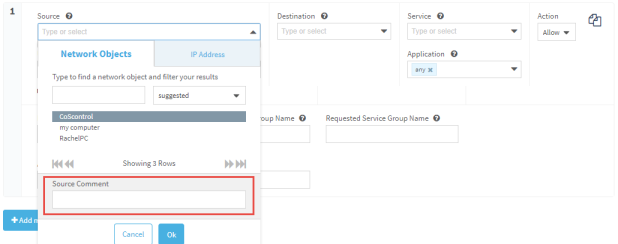
Custom fields for traffic fields can be added as an additional field (similar to custom fields for object changes) or as a field related to the Source, Destination, Service, Application or User fields.
FireFlow comes with a set of built-in custom fields called FireFlow fields. You can modify the display name and description of such fields.
All FireFlow fields appear in the Standard request template.
Note: For additional information on Cisco User Awareness – How to Define a User/User Group in a Rule, see this AlgoPedia Knowledge Base article.
Add user-defined fields
Note: You cannot add user-defined custom fields that have the same name as a built-in FireFlow field. To view a list of built-in FireFlow fields, click Advanced Configuration > FireFlow Fields.
Do the following:
- Log in to FireFlow for configuration purposes. For details, see Log in for configuration purposes.
-
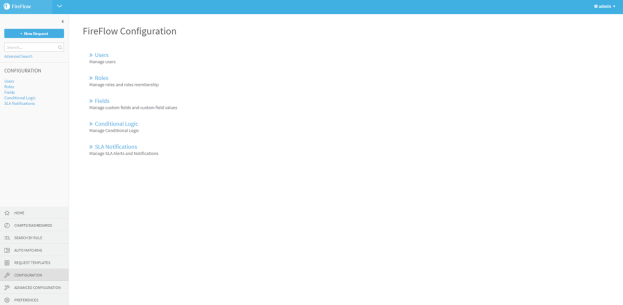
In the main menu, click Configuration.
The FireFlow Configuration page appears.
-
Click Fields.
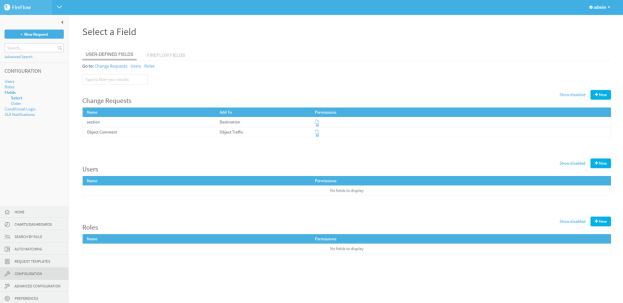
The Select a Field page appears.
-
In the area for the type of field you want to add, click + New.
For example, if you want to add a custom field to change requests, click + New in the Change Requests area.
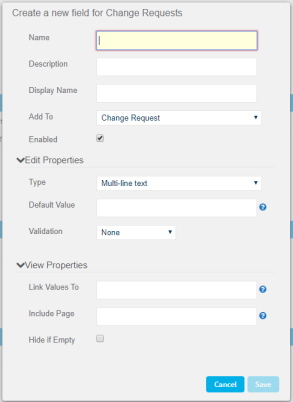
The Create a New Change Requests Field window appears.
-
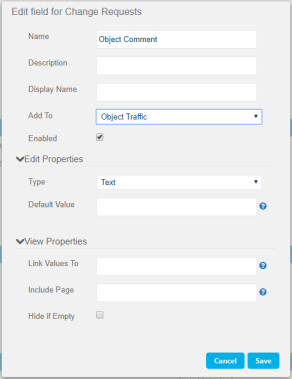
Complete the fields using the relevant information in Custom Field Page Fields (see Custom Field Page Fields).
-
Click Save.
The new field appears throughout the FireFlow user interface.
Note: By default, all user roles (including the Unprivileged role) are granted permission to view and modify the new custom field, except for the Read-Only role, which is only granted permission to view the new custom field. The Admin role is additionally granted permission to manage the new custom field.
For more details, see Manage user permissions.
|
In this field... |
Do this... |
|---|---|
|
Name |
Type a name to represent the field internally. This field is mandatory and must be filled in with a unique value containing any of the following: letters, digits, hyphen, underscore, dots, and spaces. Note: This is not the name that users will see in the FireFlow interface. |
|
Description |
Type a description of the field. This description will appear as a tooltip, when you mouse-over the custom field's name in the Create Change Request page. |
|
Display Name |
Type the name that should represent the field in the FireFlow interface. |
|
Add To |
Select the field's category. This can be any of the following:
Note: The User field only appears in FireFlow when user awareness is enabled. See Enabling/Disabling User and Network Application Awareness (see Enable / disable user and network application awareness).
Note: The Application field only appears in FireFlow when application awareness is enabled. See Enabling/Disabling User and Network Application Awareness (see Enable / disable user and network application awareness).
Note: This field only appears for change request fields. |
|
Enabled |
Select this check box to enable the field. If you do not enable the field, it will not appear in the FireFlow user interface. |
| Edit Properties |
|
|
Type |
Select the field's type. This can be any of the following:
This field type is only available for custom fields for Change Requests; it is not available for custom fields for Users or Roles.
This field type is only available for custom fields for Change Requests; it is not available for custom fields for Users or Roles.
|
|
Values source |
If the new field is a list (that is, you chose one of the "Select" options in the Type field), select the source of the values that should appear in the list. This can be any of the following:
|
|
Default Value |
Type a default value for the field. Note: FireFlow does not check whether the specified default value is valid for the field. |
|
Validation |
Select the form of validation to perform for this field. This can be any of the following:
For example:
^[d\.]+$
^[12]\d{3}$ |
| View Properties |
|
|
Link Values To |
If you want the field's value to link to a Web page, enter the URL that should open upon clicking the link. The URL can include parameters, which FireFlow will replace as follows:
For example, if you specify the URL https://Third-party_system/show_ticket?id=__CustomField__, then the field's value will be a link. If the field's value for a specific change request is “123”, then clicking on the link will open a browser displaying the Web page https://3rd_party_system/show_ticket?id=123. |
|
Include Page |
If you want the field to display a Web page, enter the URL of the desired Web page. The URL can include the same parameters as Link values to. For example, if you specify the URL https://Third-party_system/show_ticket?id=__CustomField__, and the field's value for a specific change request is “123”, then the field will display the Web page https://3rd_party_system/show_ticket?id=123. |
|
Hide if Empty |
Select this option to indicate that the custom field should only appear in the FireFlow interface if it has a value. |
Edit user-defined fields
Do the following:
- Log in to FireFlow for configuration purposes. For details, see Log in for configuration purposes.
-
In the main menu, click Configuration.
The FireFlow Configuration page is displayed.
-
Click Fields.
The Select a Field page is displayed.
-
(Optional) To display disabled user-defined custom fields, click the Show disabled link.
To revert to a list which only displays enabled user-defined custom fields, click the Hide disabled link.
-
(Optional) To search for the desired user-defined custom field, type your search in the Type to filter your results field.
The user-defined custom fields which match your search appear in the relevant area.
-
Click on the desired field's name.
The Edit a Field window is displayed.
-
Modify the fields as desired, using the information in Custom Field Page Fields (see Custom Field Page Fields).
-
Click Save.
Edit FireFlow fields
For the FireFlow fields, you may change only the display name and description. Any other change will cause FireFlow to behave unpredictably.
Do the following:
- Log in to FireFlow for configuration purposes. For details, see Log in for configuration purposes.
-
In the main menu, click Configuration.
The FireFlow Configuration page is displayed.
-
Click Fields.
The Select a Field page is displayed.
-
Click the FireFlow Fields tab.
The FireFlow Fields tab is displayed.

-
(Optional) To display disabled FireFlow fields, click the Show disabled link.
To revert to a list which only displays enabled FireFlow fields, click the Hide disabled link.
-
(Optional) To search for the desired FireFlow field, type your search in the Type to filter your results field.
The FireFlow fields which match your search appear in the relevant area.
-
Click on the desired custom field's name.
The Edit a Field window is displayed.
-
In the Description field, type a description of the custom field.
This description will appear as a tooltip, when you mouse-over the custom field's name in the Create Change Request page.
-
In the Display Name field, type the name that should represent the field in the FireFlow interface.
-
Click Save.
Disable / enable user-defined fields
If desired, you can disable a user-defined field, so that it no longer appears in the FireFlow interface. You can also re-enable disabled user-defined fields.
Note: Values that were entered for a user-defined field before it was disabled are retained in the FireFlow database.
Do the following:
- Log in to FireFlow for configuration purposes. For details, see Log in for configuration purposes.
-
In the main menu, click Configuration.
The FireFlow Configuration page is displayed.
-
Click Fields.
The Select a Field page is displayed.
-
(Optional) To display disabled user-defined custom fields, click the Show disabled link.
To revert to a list which only displays enabled user-defined custom fields, click the Hide disabled link.
-
(Optional) To search for the desired user-defined custom field, type your search in the Type to filter your results field.
The user-defined custom fields which match your search appear in the relevant area.
-
Click on the desired field's name.
The Edit a Field window is displayed.
-
Do one of the following:
- To disable a user-defined custom field, clear the Enabled check box.
- To enable a user-defined custom field, check the Enabled check box.
-
Click Save.
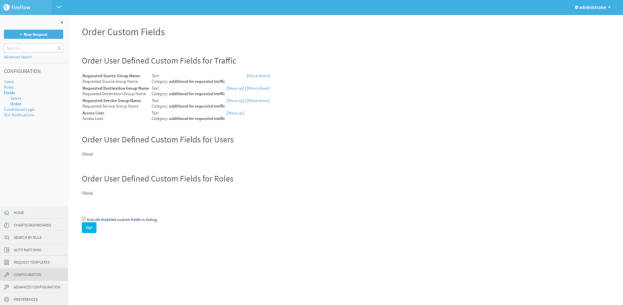
Configure the order of user-defined fields
When multiple user-defined fields are defined for change requests, users, or roles, you can configure the order they appear.
- For traffic and multicast traffic request templates (excluding IPv6 traffic templates), all fields are ordered per template (not globally).
- For all other request template types, traffic fields and object fields are ordered globally using the procedure below. All other fields for these templates are ordered per template.
- For ordering user and role fields, all fields are ordered globally using the procedure below.
Do the following:
- Log in to FireFlow for configuration purposes. For details, see Log in for configuration purposes.
-
In the main menu, click Configuration.
The FireFlow Configuration page is displayed.
-
Click Fields.
The Select a Field page is displayed.
-
In the main menu, click Order.
The Order Custom Fields page appears. Within each category, the fields are listed in the order that they will appear in the FireFlow Web interface.
-
In each category, do one or more of the following:
- To move a change request up in the list, click Move up next to it.
- To move a change request down in the list, click Move down next to it.
The fields will appear in the specified order.
Note: These links only appear when there is more than one custom field in the category.
View role permissions for custom fields
You can view role permissions for user-defined fields or FireFlow fields.
For more details, see Manage user permissions.
Do the following:
-
In the main menu, click Configuration.
The FireFlow Configuration page is displayed.
-
Click Fields.
The Select a Field page is displayed.
-
If you want to view role permissions for a FireFlow field, click the FireFlow Fields tab.
-
(Optional) To display disabled fields, click the Show disabled link.
To revert to a list which only displays enabled fields, click the Hide disabled link.
-
(Optional) To search for the desired field, type your search in the Type to filter your results field.
The fields which match your search appear in their designated area.
-
In the row of the relevant role, click .
The roles permissions window appears.
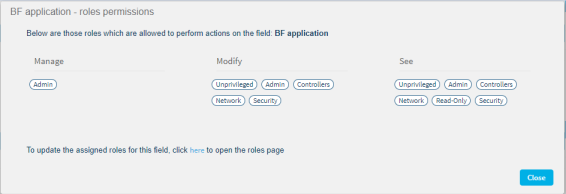
Users assigned a role with permission to Manage the field can view and modify the field's definition (for example, they can modify the field's name, disable it, and so on). Users assigned a role with permission to Modify the field can modify the field's value. Users assigned a role with permission to See the field can only view the field's value.
-
Click Close.
