
Modify fields in request templates
This topic describes how to modify the fields in specific change request templates.
Modify fields for IPv4 traffic and multicast request templates
When adding or editing IPv4 traffic, multicast traffic, or multi device object change request templates, you can modify the content and layout for the template's fields and sections.
Default template sections
The following table describes the default template sections , and their supported customizations.
|
Section Name |
Can Remove Section? |
Rename? |
Customize Fields? |
|---|---|---|---|
|
General |
Yes (The fields in this section will become options when adding a new field to another section.) |
Yes |
Yes |
|
Traffic Note: This section is only for IPv4 and multicast request templates. |
No |
Yes |
Yes |
|
Objects Note: This section is only for multi device object change request templates. |
No |
No |
No |
|
More |
Yes (The fields in this section will become options when adding a new field to another section.) |
Yes |
Yes |
|
Hidden Fields |
No |
No |
Yes |
For more details, see:
Do any of the following:
| Rename a section |
Do the following:
|
| Add a new section |
Do the following:
|
| Reposition a section |
Do one of the following:
|
| Remove a section |
Do the following: Click The Remove section confirmation message appears.
Note: Removing a section will cause it's fields to appear as options when adding a new field to other sections.
|
| Add custom instructions to a section | See Add custom instructions to IPv4, multicast, and multi-device object change templates. |
 in the section's heading.
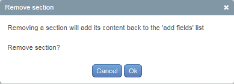
Add a general (non-traffic) change request field
Do the following:
-
Click + Add new field to section, and either select a pre-defined field or the Create a new field option.
Either the field appears at the bottom of the screen, or the Create a new field for Change Request dialog box appears.
-
Complete the fields as needed. For details, see New Field for Change Request Fields.
When you're done, click Save.
Note: This is only relevant for IPv4 and multicast traffic request templates (not mult device object change request templates).
Do the following:
-
In the Traffic section, click + Add or remove traffic fields.
The Add or remove traffic fields dialog box appears.
-
To create a new traffic field, click + New traffic field.
The Create a new field for Change Request dialog box appears.
Complete the fields using the information in New Field for Change Request Fields (see New Field for Change Request Fields).
Click Save.
The field is defined, and ready to be assigned to a template.
-
To assign a pre-defined field to the template, select the check box for the desired field, and then click Save.
The field(s) appear in the template.
-
To create a space between fields, click + Add new field to section, and then select Add field spacer.
An Empty space place holder appears at the bottom of the section.

Reposition the place holder like any field.
-
To remove a field, hover over the field and click
 .
. -
To reposition a field, hover over the field, and click and hold
 , and drag and drop the field to the desired position.
As you drag the field, the other fields re-arrange, and a Drag here target appears in suitable locations.
Note: Fields can be moved between sections, as well as within sections. For example, fields added to the Hidden section can be moved to a visible section.
Add custom instructions to IPv4, multicast, and multi-device object change templates
You can add custom instructions for a template, or for a specific section of the template.
Note: Custom instructions are not supported for the Hidden Fields section.
Do the following:
-
Do one of the following:
- To add custom instructions for the whole request form, at the top of the page, click Type some instructions for this request form (will be visible to everyone).
- To add custom instructions for a section of the request form, at the top of the section, click Type some instructions for this section (will be visible to everyone).
A text box appears.
-
Type the desired instructions in the box.
-
Click outside the text box to save your text and close the text box.
-
To remove the instructions, click
 .
.
|
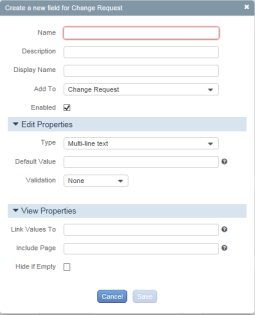
In this field... |
Do this... |
|---|---|
|
Name |
Type the name of field. |
|
Description |
Type a description of field. |
|
Display Name |
Type the display name of the field. (The name that will appear for the field in the request form.) |
|
Add To |
Select the field type in the drop-down menu. The options in the menu depend on how/where you are creating the new field.
|
|
Enabled |
Select the check box to enable the field (Default). Clear the check box to disable the field. Disabled fields cannot be included in request templates. |
|
Type |
Select the type of field in the drop-down menu. |
|
Default Value |
Type a default value for the field, if desired. |
|
Validation |
Select a validation method. Possible values are:
This field is only relevant for general change request fields (not traffic fields). |
|
Link Values To |
Type the location of the view properties to which to link. |
|
Include Page |
Type the location of the page to include. |
|
Hide if Empty |
Select the check box to hide the field if it is empty. |
Modify fields for other request template types
When adding or editing request templates of any type other than IPv4 traffic and multicast, follow this procedure to add, remove, reorder, or reposition fields.
Do the following:
-
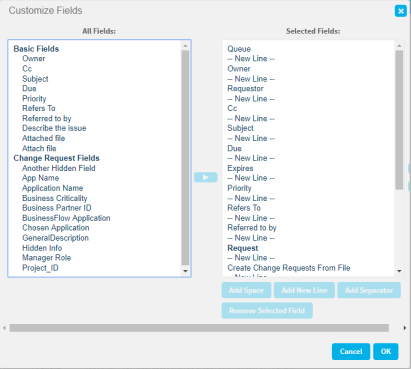
In the Change Requests Fields area, click Customize Fields.
The Customize Fields dialog box appears.
-
Do any of the following:
-
To add a field, select it in the All Fields list box and click
 .
.All custom fields defined in the system appear.
-
To remove a field, select it in the Selected Fields list box and click Remove Selected Field.
-
To reorder fields, do the following:
- To move a field up, select it in the Selected Fields list box and click
 .
. - To move a field down, select it in the Selected Fields list box and click
 .
.
Note: This controls the order of change request user defined custom fields only. The order of user defined custom fields for traffic fields or object fields are defined globally, not per template.
- To move a field up, select it in the Selected Fields list box and click
-
To reposition fields, do the following:
-
To move the next field to a new line, click Add New Line.
All fields listed between any two --New Line-- actions will appear on one line. For example, you can use Add New Line to create a two-column request form.
-
To move the next field a space to the right, click Add Space.
The --Space-- action serves as an empty field place holder. You can use Add Space to align the fields horizontally, as you desire.
-
-
Example
The following example shows how to use the Add New Line and Add Space actions to create a custom layout.
To create a form that looks like the following:
|
Subject |
|
|---|---|
|
Requestor |
Cc |
|
Due |
Expires |
|
|
Application |
|
|
Business Unit |
Configure the Selected Fields area as follows:
Subject
-- New Line --
Request
Cc
-- New Line –
Due
Expires
-- New Line –
-- Space –
Application
-- New Line --
-- Space –
Business Unit
Note: Application and Business Unit are user defined custom fields.
The custom fields appear in the template, in the position you specified.
