
Backup/Restore
This section describes how to back up and restore your AlgoSec Security Management Suite from AFA using both automatic scheduling and manual processes.
AFA performs a full backup of all data including ASMS users, devices, and other configurations and optional content (such as reports and traffic logs). These files can be saved locally or on a remote server. Only one backup or restore process can run at a single time.
Note: Backups do not include customizations or Linux configurations (for example, IP tables) done locally on the ASMS host.
Backup and restore prerequisites
Note the following before starting your backup or restore procedure:
| User roles | You must be an administrator to perform the backup or restore. |
| Version |
You can only restore ASMS to the same major version from which the backup was taken. If you have upgrades to perform, upgrade your system only before the backup or after the restore. Do not attempt to upgrade your system between backup and restore processes. |
| System processes |
Restoring your system requires some downtime. Disable any jobs scheduled to run during the restore process, such as ASMS monitoring or analysis. Reinstate the scheduling once the restore is complete. |
| System requirements |
We recommend always restoring to an appliance with the same number of cores as the appliance from which the backup was taken. |
For more details, see:
- Backup and restore on distributed architectures
- Define backup options
- Back up your system
- Restore your system
Backup and restore on distributed architectures
Backup and restore handles data on a single appliance. Performing a restore overwrites the settings and device definitions on each target node with the data from the source node.
Additionally:
- In geographic distributions, the target appliance for the restore must have the same number of Remote Agents, with the same names, as the appliance on which the backup was performed.
-
In load distributions, restoring to an environment with fewer Load Units than existed on the backup environment will impact performance.
Note: We recommend running your backup and restore on the Central Manager or Master Appliance only.
Define backup options
In the AFA Administration area, browse to the Options > Backup / Restore tab, and define the Backup Scheduler options and Backup Server options.
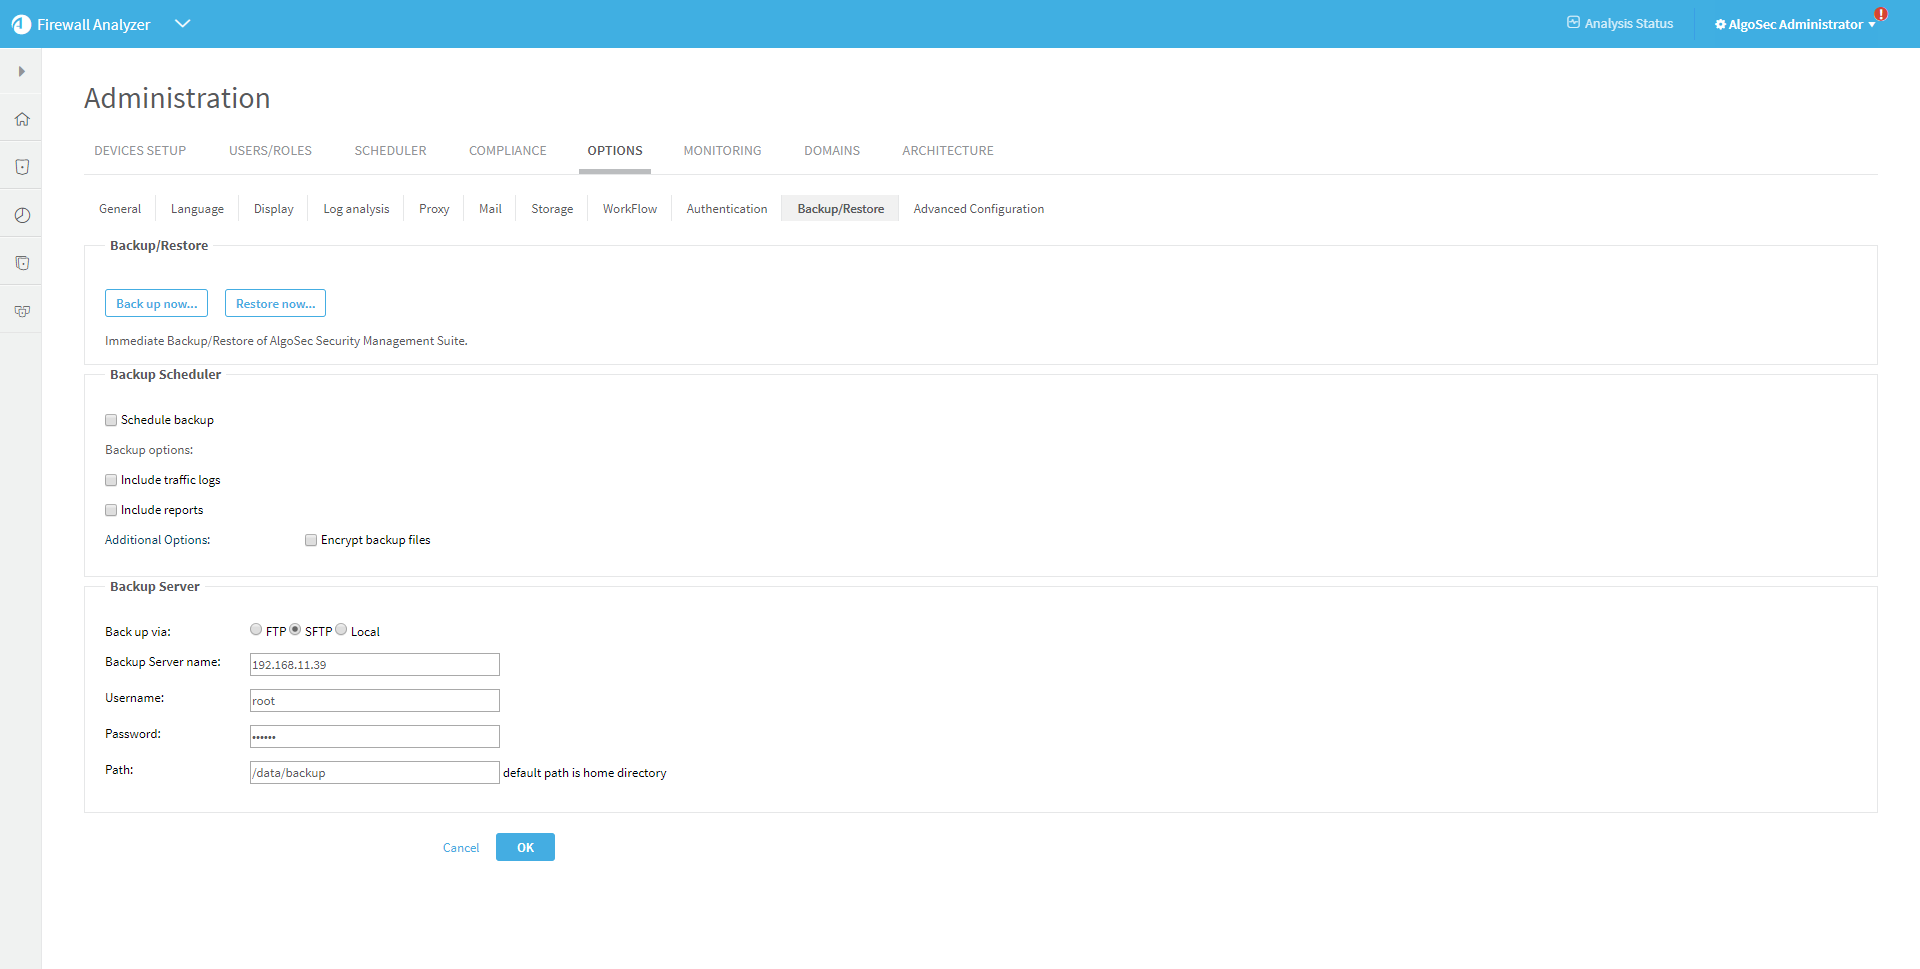
Define the following options to schedule a regular system backup:
| Schedule backup |
Select to schedule a regular backup process. Define the daily, weekly, or monthly backup schedule in the Scheduling Options area that appears below. |
| Backup options |
Select either of the following:
Note: Including traffic logs and / or reports can have a significant impact on the amount of disk space required and time it takes to finish the backup. |
| Additional options |
Select Encrypt backup files to configure encryption for the backup file. In the Password and Retype password fields that appear, enter and confirm the password you want to use to secure the backup file. |
Define the following options to define your backup server:
Back up your system
This procedure describes how to perform an immediate ASMS backup, in addition to any backup process you may have scheduled.
Do the following:
-
In the AFA Administration area, browse to the Options > Backup / Restore tab.
-
Click Back up now...
-
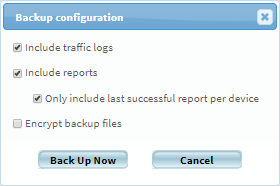
In the Backup configuration dialog that appears, select any of the following options as needed:
Include traffic logs Include traffic logs. Includes traffic logs in the backup.
Note: Including traffic logs can have a significant impact on the amount of disk space and time it takes to finish the backup.
Include reports Includes AFA reports in the backup. By default, this includes all reports created since the last scheduled backup.
Note: Including all existing reports can have a significant impact on the amount of disk space required and time it takes to finish the backup.
To save disk space, select Only include last successful report per device. AFA will perform a full backup but only include the latest report per device.
Encrypt backup files Select to configure encryption specifically for this backup file.
In the Password and Retype password fields that appear, enter and confirm the password you want to use to secure the backup file.
-
In the Backup configuration dialog, click Back Up Now to start the backup.
Backup files are created in the path configured, including several directories containing your backup files. Each directory contains a single backup, where the folder name is the epoch timestamp of when the backup was generated.
Tip: (recommended) In addition to taking a backup, for virtual and host-based appliances, when available, power-off the machine and take a snapshot (cold snapshot).
If your system has a cluster (CM and/or RA), the order in which you take the snapshots is critical.
-
Go the algosec_conf menu and run option 13 HA/DR Setup.
-
Run option 1. View cluster status details.
-
Take a snapshot first from the node without DB in its row and then take a snapshot of the node with DB in its row.
For example, if the results are:

Node 2. DR Primary doesn’t show the DB in its row, so its snapshot should be taken first.
Node 1. Primary shows the DB in its row, so its snapshot should be taken second.
Restore your system
This procedure describes how to restore your ASMS system from a saved backup file. Restoring ASMS replaces all existing users, devices, and configurations with those specified in the selected backup file.
Do the following:
-
If you are working with HA/DR clusters, break your cluster before starting your restore.
-
If the backup you want to restore is from a machine that had FireFlow configured, make sure your are restoring to a machine also with FireFlow configured.
-
In the AFA Administration area, browse to the Options > Backup / Restore tab.
-
Click Restore now...
-
In the Backup configuration dialog that appears, enter the following values:
File name Enter the filename of the backup file you want to use. Backup file requires password Select if the backup file is encrypted. Enter the required password in the Password field that appears.
Note: Entering an incorrect or old password restores only those reports that were not encrypted, or those encrypted with the password entered. In such cases, the restore process does not fail, but error messages in the log indicate the names of the reports that failed to restore.
The restore process begins.
Note: ASMS is unresponsive for the duration of the restore process.
To view details during the process, see the log file at /data/algosec-ms/logs/ms-backuprestore.log.
- After the restore is complete, run a report on All Firewalls to ensure a valid network map.
Note: If in the backup process you selected "only include the last successful report per device," when the restore completes you may see broken links to other reports.
