
Manage SLA notifications
Relevant for: Administrators
In addition, users can be subscribed to SLA notifications, so that they periodically receive the SLA notifications' content via email.
This section explains how to configure SLA notifications.
Add SLA notifications
Do the following:
-
Log in to FireFlow for configuration purposes. For details, see Log in for configuration purposes.
-
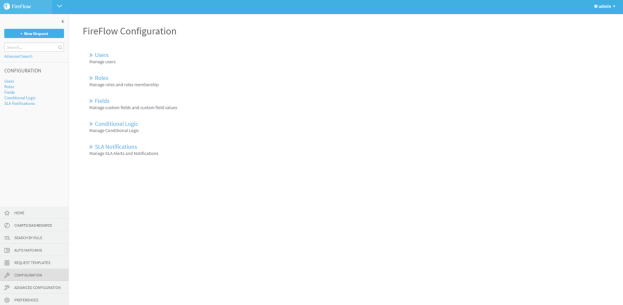
In the main menu, click Configuration.
The FireFlow Configuration page is displayed.
-
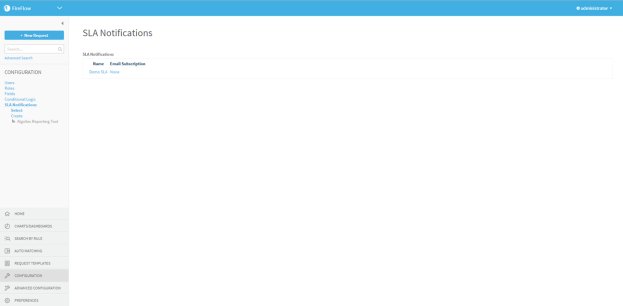
Click SLA Notifications.
The SLA Notifications page is displayed.
-
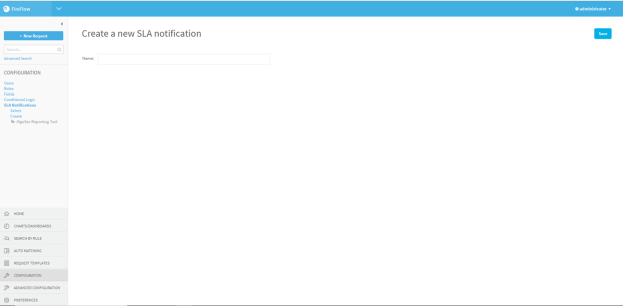
In the main menu, click Create.
The Create a new SLA notification page is displayed.
-
In the Name field, type a name for the SLA notification.
-
Click Save.
-
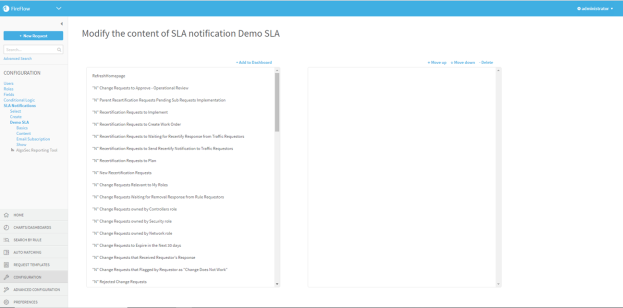
In the main menu, under the SLA notification's name, click Content.
The Modify the content of SLA notification page is displayed.
-
For each element you want to add to the SLA notification, do the following:
-
In the Available list box, select the element you want to add.
For information on each element, see SLA Notification Elements (see SLA notification elements).
-
Click
 .
.The selected element moves to the right list box. The order that the elements appear in the box represents the order in which they will appear in the SLA notification.
-
To move the element up or down in the box, select the element and click the
 or
or  buttons.
 -
To delete the element, select it and click Delete.
-
Your changes are saved.
|
Select this element... |
To add this to the SLA notification... |
|---|---|
|
"N" Soon to be due change requests |
Pre-defined search results consisting of a list of open change requests in the system that have a due date that has passed, that is the current date, or that is the day after the current date. |
|
"N" New Recertification Requests |
Pre-defined search results consisting of a list of recertification requests in the system that are new and still in the Request stage. |
|
"N" New Change Requests |
Pre-defined search results consisting of a list of change requests in the system that are new and still in the Request stage, and whose traffic has already been checked against devices. |
|
"N" Open Change Requests |
Pre-defined search results consisting of a list of change requests in the system that are currently open. |
|
"N" Parent Recertification Requests Pending Sub Requests Implementation |
Pre-defined search results consisting of a list of parent recertification requests in the system that are currently in the Implement stage and awaiting implementation of the relevant sub-requests. |
|
"N" Parent Requests Pending Sub Request Implementation |
Pre-defined search results consisting of a list of parent requests in the system that are currently in the Implement stage and awaiting implementation of the relevant sub-requests. |
|
"N" Recertification Requests to Create Work Order |
Pre-defined search results consisting of a list of recertification requests in the system that are currently in the Implement stage and awaiting a work order to be created. |
|
"N" Recertification Requests to Implement |
Pre-defined search results consisting of a list of recertification requests in the system that are currently in the Implement stage and awaiting implementation. |
|
"N" Recertification Requests to Plan |
Pre-defined search results consisting of all recertification requests in the system that are currently in the Plan stage. |
|
"N" Recertification Requests to Send Recertify Notification to Traffic Requestors |
Pre-defined search results consisting of a list of recertification requests in the system that are currently in the Approve stage, and for which a recertification notification will be sent to the traffic requestors. |
|
"N" Recertification Requests to Validate |
Pre-defined search results consisting of a list of recertification requests in the system that are currently in the Validate stage. |
|
"N" Recertification Requests Waiting for Recertify Response from Traffic Requestors |
Pre-defined search results consisting of a list of recertification requests in the system that are currently in the Approve stage and awaiting confirmation from the traffic requestors that the requested recertification is approved. |
|
"N" Rejected Change Requests |
Pre-defined search results consisting of a list of change requests in the system that were rejected. |
|
"N" Resolved Change Requests |
Pre-defined search results consisting of a list of change requests in the system that have been resolved. |
|
"N" Change Requests owned by Controllers group |
Pre-defined search results consisting of a list of change requests in the system that are owned by the Controllers role. |
|
"N" Change Requests owned by Network group |
Pre-defined search results consisting of a list of change requests in the system that are owned by the Network role. |
|
"N" Change Requests owned by Security group |
Pre-defined search results consisting of a list of change requests in the system that are owned by the Security role. |
|
"N" Change Requests Relevant to My Groups |
Pre-defined search results consisting of a list of change requests in the system that are relevant to the user roles to which you belong. |
|
"N" Change Requests that are due to be recertified |
Pre-defined search results consisting of a list of traffic change requests in the system that expired, and which should be recertified. |
|
"N" Change Requests Flagged by Requestor as "Change Does Not Work" |
Pre-defined search results consisting of a list of change requests in the system that have been flagged by the requestor as "Change Does Not Work". |
|
"N" Change Requests that Received Requestor's Response |
Pre-defined search results consisting of a list of change requests in the system that are currently in the Validate stage and received the requestor's confirmation that the requested change was implemented successfully. |
|
"N" Change Requests to Approve |
Pre-defined search results consisting of a list of change requests in the system that are currently in the Approve stage. |
|
"N" Change Requests to Create Work Order |
Pre-defined search results consisting of a list of change requests in the system which are currently in the Implement stage and awaiting a work order to be created. |
|
"N" Change Requests to Expire in the Next 30 days |
Pre-defined search results consisting of a list of change requests in the system that will expire within the next 30 days. |
|
"N" Change Requests to Implement |
Pre-defined search results consisting of a list of change requests in the system that are currently in the Implement stage and awaiting implementation. |
|
"N" Change Requests to Plan |
Pre-defined search results consisting of all change requests in the system that are currently in the Plan stage. |
|
"N" Change Requests to Review |
Pre-defined search results consisting of a list of change requests in the system that are currently in the Review stage and awaiting a controller's review. |
|
"N" Change Requests to Send Removal Notification to Rule Requestors |
Pre-defined search results consisting of a list of change requests in the system that are currently in the Approve stage, and for which a rule removal notification will be sent to the rule's traffic requestors. |
|
"N" Change Requests to Validate |
Pre-defined search results consisting of a list of change requests in the system that are currently in the Validate stage. |
|
"N" Change Requests Waiting for Removal Response from Rule Requestors |
Pre-defined search results consisting of a list of change requests in the system that are currently in the Approve stage and awaiting confirmation from the rule’s traffic requestors that the requested rule removal is approved. |
|
"N" Change Requests Waiting for Requestor's Response |
Pre-defined search results consisting of a list of change requests in the system that are currently in the Validate stage and awaiting the requestor's confirmation that the requested change was implemented successfully. |
|
"N" Total New Change Requests |
Pre-defined search results consisting of a list of all change requests in the system that are new and still in the Request stage, including change requests whose traffic has not yet been checked against devices. |
|
Bookmarked Change Requests |
A list of change requests that the user bookmarked. |
|
My Change Requests |
Pre-defined search results consisting of a list of change requests in the system that are owned by you. |
|
RefreshHomepage |
Controls for refreshing the page. |
|
Unowned Change Requests |
Pre-defined search results consisting of a list of change requests in the system that currently have no owner. |
| Saved Search Name |
A custom search that was saved under "FireFlow's saved searches", and which is available to your user role. For more details, see Search for change requests. |
| Chart Name |
A chart that was saved under "FireFlow's saved searches", and which is available to your user role. For more details, see Reports, charts, and dashboards. |
|
Search for chart Chart Name |
A custom search on which a certain chart is based. |
Edit SLA notifications
Do the following:
- Log in to FireFlow for configuration purposes. For details, see Log in for configuration purposes.
-
In the main menu, click Configuration.
The FireFlow Configuration page is displayed.
-
Click SLA Notifications.
The SLA Notifications page is displayed.
-
Click on the name of the desired notification.
The SLA notification appears.
-
To modify the SLA notification's name, do the following:
-
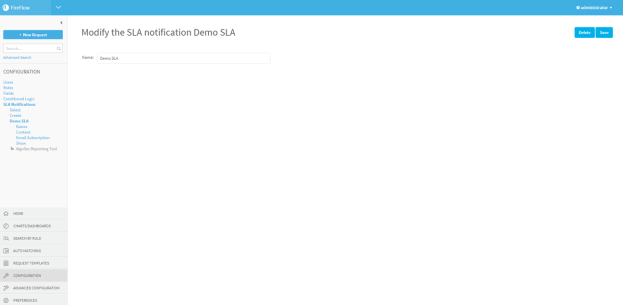
In the main menu, under the SLA notification's name, click Basics.
The Modify the SLA notification page is displayed.
-
In the Name field, type a name for the SLA notification.
-
Click Save.
-
-
To modify the SLA notification's content, do the following:
-
In the main menu, under the SLA notification's name, click Content.
The Modify the content of SLA notification page is displayed.
-
For each element you want to add to the SLA notification, do the following:
-
In the Available list box, select the element you want to add.
For information on each element, see SLA Notification Elements (see SLA notification elements).
-
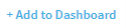
Click +Add to Dashboard.
The selected element moves to the right list box. The order that the elements appear in the box represents the order in which they will appear in the SLA notification.
- To move the element up or down in the box, select the element and click Move down or Move up.
- To delete the element, select it and click - Delete.
-
-
Your changes are saved.
Manage email subscriptions to SLA notifications
By default, when you create an SLA notification, you are automatically subscribed to it, and emails containing the SLA notification's content will be sent to the email address associated with your account. If desired, you can configure FireFlow to send these emails to other recipients, and/or change the frequency and time at which these emails are sent.
Do the following:
- Log in to FireFlow for configuration purposes. For details, see Log in for configuration purposes.
-
In the main menu, click Configuration.
The FireFlow Configuration page is displayed.
-
Click SLA Notifications.
The SLA Notifications page is displayed.
-
Click on the name of the desired notification.
The SLA notification appears.
-
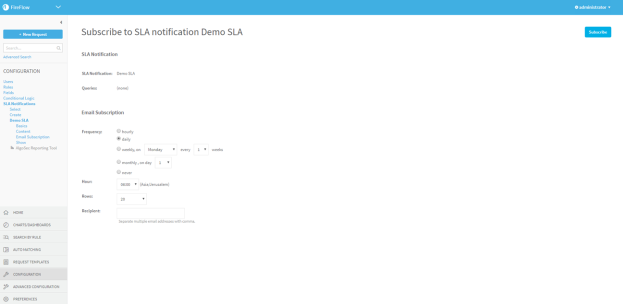
In the main menu, under the SLA notification's name, click Email Subscription.
The Subscribe to SLA notification page is displayed.
-
Configure the fields as needed. For details, see Email Subscription Fields.
-
Click Subscribe.
|
In this field... |
Do this... |
|---|---|
|
Frequency |
Specify how often emails containing SLA notification content should be sent. This can have the following values:
|
|
Hour |
Select the hour in the displayed time zone, at which emails containing SLA notification content should be sent. Note: The time zone can be configured in your user settings. |
|
Rows |
Select the number of change requests in each saved search that should appear in emails containing dashboard content. |
|
Recipient |
Type a list of email addresses to which emails containing SLA notification contents should be sent. The email addresses must be separated by commas. If this field is left empty, emails will be sent only to the email address associated with your FireFlow user account. However, if this field is filled in, emails will not be sent to the email address associated with your FireFlow user account, unless you include your email address in the list. |
Delete SLA notifications
Do the following:
- Log in to FireFlow for configuration purposes. For details, see Log in for configuration purposes.
-
In the main menu, click Configuration.
The FireFlow Configuration page is displayed.
-
Click SLA Notifications.
The SLA Notifications page is displayed.
-
Click on the name of the desired notification.
The SLA notification apears.
-
In the main menu, under the SLA notification's name, click Basics.
The Modify the SLA notification page is displayed.
-
Click Delete.
A confirmation message appears.
-
Click OK.
The SLA notification is deleted.
