Update data via CSV files
This topic describes how to update AppViz data from CSV files from the AppViz (missing or bad snippet) area or via CLI.
Data can also be imported from CSV files in the main Discovery area. For details, see Discover applications .
Supported import data
AppViz provides the ability to import the following data from CSV files:
- Flows to applications (including discovery search results)
- Applications and custom application fields
- Contacts and custom contacts fields
- Contacts and their roles in applications
- Network Objects and their custom fields
CSV file sources
Some options for acquiring the CSV file include:
- Exporting it from your configuration management database (CMDB).
- Exporting it from AlgoSec Firewall Analyzer. For details, see Export flows directly from AFA.
- Creating it through a AppViz discovery search. For details, see Discover applications.
- Preparing it manually from scratch or using an a example CSV file. For details, see Prepare a CSV file.
When you have the data ready, run the update.
For details, see:
Prepare a CSV file
Note: You can download an example of any of the types of CSV files. In the Import tab of the (missing or bad snippet) area you can download examples of the Applications, Contacts, Flows or Application Contacts CSV file. In the Objects Update tab of the Administration area you can download an example Network Object CSV file.
Do the following:
- Open a new text file or download an example CSV file.
-
In the first line of the file, type a list of column headers. The headers must be separated by commas.
Column requirements:
The first column must be the application name. All other column headers are optional, and should contain custom fields for the applications.
-
For each application you want to import, type a new line containing values that correspond to the column headers. The values must be separated by commas.
For example:
Application Name,Business Unit,Geographical Location,Internal app-id
Application#1,Financial Services,Europe,241154
AnotherApp,IT,Boston MA,044914
- Save the file.
Do the following:
- Open a new text file or download an example CSV file.
-
In the first line of the file, type a list of column headers. The headers must be separated by commas.
Column requirements:
The first four columns must be first, middle, last, and email (in that order). All other column headers are optional, and should contain custom fields for the contacts.
-
For each contact you want to import, type a new line containing values that correspond to the column headers. The values must be separated by commas.
For example:
First,Middle,Last,Email,Extension,Cell Phone,Number of children
John,,Smith,[email protected],#1234,(614)113-1452,0
Ned,Nicholas,Networks,[email protected],#9999,(614)113-1515,2
- Save the file.
Importing contacts for application contact roles allows you to specify contacts for the contact roles of many applications. The contact roles and the contacts you specify for an application can be existing contacts/contact roles or new contacts/contact roles. Any new contacts/contact roles will be automatically created when you run the import.
Do the following:
- Open a new text file or download an example CSV file.
-
In the first line of the file, type a list of column headers. The headers must be separated by commas.
Column requirements:
The first column must be the application name. All other column headers should contain contact roles; you can include as many columns as you desire.
-
For each application you want to import contacts for, type a new line containing values that correspond to the column headers. The corresponding value for each contact role should be the email address of the contact you want to assign to the role. The values must be separated by commas.
Note: If you type an email address that does not correspond to an existing contact, a new contact will be created. The new contact's name field and email field will both be the new email address.
For example:
Application,Application Owner,IT Support,Business RepresentativeNetBackup,[email protected],[email protected],[email protected]
Importing the above example will cause the following:
- If the contact role's Application Owner, IT Support, or Business Representative do not exist, they will be created.
- If the contacts with the email addresses [email protected], [email protected], or [email protected] do not exist, they will be creates.
- For the application NetBackup, the contact with the email address [email protected] will be assigned the Application Owner role, the contact with the email address [email protected] will be assigned the IT Support role, and the contact with the email address [email protected] will be assigned the Business Representative role.
- Save the file.
Importing flows and custom flow fields allows you to assign flows to many applications. The flow fields you specify can include new custom flow fields. You can import application flows, shared flows and subscribed flows.
Do the following:
- Open a new text file or download an example CSV file.
-
In the first line of the file, type a list of column headers. The headers must be separated by commas.
You can optionally download an example CSV file for importing flows and use it as a template by replacing the sample values with your own values. For details, see Download CSV examples.Mandatory Headers:
- application. The name of the application, or in the case of a shared flow, the name of the shared application. In case of a subscribed flow, the name of the subscribed application.
-
sources. A comma separated list of existing network object names and/or IP addresses/ranges. Leave this field empty to specify the source as the placeholder for a shared flow.
Note: Any IP addresses/ranges included in the source or destination of the flow that are not defined as an object will automatically be defined as an object in AppViz.
-
destinations. A comma separated list of existing network object names and/or IP addresses/ranges. Leave this field empty to specify the destination as the placeholder for a shared flow.
- services. A comma separated list of service objects. Leave this field empty for subscribed flows.
- comment. A comment for the flow.
- name. The name of the flow. For subscribed flows, the name needs to specify the shared application and shared flow name in the following format: APP:{<shared application>},FLOW:{<shared flow name>}. If this field is left empty (for shared or application flows), AppViz will generate a sequential name for the flow.
Optional Headers:
- network applications. (relevant only when application awareness is enabled) A comma separated list of network application objects enclosed by quotations.
- user. (relevant only when user awareness is enabled) A comma separated list of usernames enclosed by quotations.
In case of different objects with the same name (defined on different devices), you can specify the object name with the device name, separated by a semicolon. For example, if there is a network object "internal" on device1, and a network object "internal" on device2, you can specify that you intend the network object on device1 by typing internal;device1.
All other column headers are optional, and can contain custom fields for the flows.
-
For each flow you want to import, type a new line containing values that correspond to the column headers. The values must be separated by commas.
For example:
Application,Sources,Destinations,Services,Comment,NameNetBackup,BackupServer,"BackedUpWorkstations,BackedUpServers",NetBackupServices,NetBackup,"BackedUpWorkstations,BackedUpServers",BackupServer,NetBackupServices,
Note: When you specify multiple objects for a single field, these objects must be in a comma separated list. When viewing the CSV as a spreadsheet, the comma separated list mustl be in a single cell. When viewing the CSV as text, the comma separated list must be enclosed in quotations.
- Save the file.
Do the following:
- Open a new text file or download an example CSV file.
-
In the first line of the file, type a list of column headers. The headers must be separated by commas.
Column requirements:
The first two columns, in the following order, must be:
- Network Object Name. A string.
- Network Object Contents. An IP address (Host), a range/CIDR (Range), a comma delimited list of network objects (Group), or empty/no content (Abstract).
All other column headers are optional, and should contain custom fields for the network objects.
Note: There are no requirements for the header names.
In case of different objects with the same name (defined on different devices), you can specify the object name with the device name, separated by a semicolon. For example, if there is a network object "internal" on device1, and a network object "internal" on device2, you can specify that you intend the network object on device1 by typing internal;device1.
-
For each network object you want to import, type a new line containing values that correspond to the column headers. The values must be separated by commas.
For example:
Name,AddressesWebFarm1,192.159.221.0/24WebFarm2,192.159.222.0-192.159.222.255WebFarm3,192.159.223.0/24WebFarms,WebFarm1,WebFarm2,WebFarm3,WebFarm4;WebFarmDevice
Importing the above example will create four new network objects:
- WebFarm1, which contains 192.169.221.0/24
- WebFarm2, which contains 192.159.222.0-192.159.222.255
- WebFarm3, which contains 192.159.223.0/24
- WebFarms, which contains the 3 new web farm objects as well as WebFarm4 (which is a device object on the device named WebFarmDevice).
- Save the file.
Download CSV examples
This section explains how to download CSV examples for Applications, Flows, Contacts, or Application Contacts.
 see steps to download a CSV example here
To download a CSV example from the Administration area:
-
In the toolbar, click your username.
A drop-down list appears.
-
In the drop-down list, select Administration.
The Administration page appears in the workspace.
-
Click the Import tab.
The Import tab appears.
-
Locate the record type you want to download (Applications, Flows, Contacts, or Application Contacts) and click Download Example.
The sample CSV file downloads to your computer.
To download a flows CSV example from the Discovery area:
-
Go to the Discovery area. For details, see Welcome to AppViz.
The Discovery area appears in the workspace.
-
In the Import Flows from File area, click Download Example.
The sample CSV file downloads to your computer.
 To download a flows CSV example from the Settings area:
-
In the toolbar, click your username.
A drop-down list appears.
-
In the drop-down list, select Settings.
The Settings page appears in the workspace.
-
Click the Import tab.
The Import tab appears.
-
Use the Record Type drop-down to select the type of record to import: Applications, Flows, Contacts, or Application Contacts.

-
Click Download Example to download a sample CSV file of the selected Record Type.
A sample CSV file downloads to your computer.

Import CSV data into AppViz
After acquiring the CSV file, import the data into AppViz.
Applications, Flows, Contacts, or Application Contacts
The AppViz CSV import interface allows you to import CSV data, track the status history of imports, and access detailed error information when needed.
Note: For importing network objects CSV data, see Network objects.
Note: You can optionally import CSV files using the following methods:
-
In the Discovery area. For details, see Discover applications
-
Using the CLI. For details, see Import CSV data into AppViz via CLI.
To import the data from the CSV file:
See the following steps to import data here
-
In the toolbar, click your username.
A drop-down list appears.
-
In the drop-down list, select Administration.
The Administration page appears in the workspace.
-
Click the Import tab.
The Import tab appears.

-
In the area relevant to the type of data you are importing, click Select a File.
The sample CSV file downloads to your computer.
-
Select the desired CSV file.
The selected file appears in the Web Interface.
-
Click Import.
The file is imported, and a success message appears with information about the import.

-
In the toolbar, click your username.
A drop-down list appears.
-
In the drop-down list, select Settings.
The Settings page appears in the workspace.
-
Click the Import tab.
The Import tab appears.

-
Use the Record Type dropdown to select the type of record to import: Applications, Flows, Contacts, or Application Contacts.

-
Click Select File.
The Open File dialog box opens.
-
Select the desired CSV file and click Open.
The selected file appears in the Web Interface.
-
Click Upload to import the file.
The file is imported, and a success message appears with information about the import.

Note: Click View to view the updated import list on the Import page.


Note: You can see a history of past uploads on the lower portion of the screen. Use the dropdown filters to Record Type and Time Period to filter the history results.
You can choose to import the CSV files manually or schedule automatic updates from the AppViz database.
Additionally, you can review the results of the last import. For details, see Update objects from a CMDB .
Note: You can optionally import network objects using the CLI. For details, see Import CSV data into AppViz via CLI.
To run the update for network objects:
-
In the toolbar, click your username.
A drop-down list appears.
-
In the drop-down list, select (missing or bad snippet).
The (missing or bad snippet) page appears in the workspace.
-
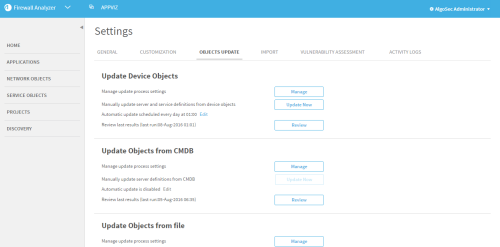
Click the Objects Update tab.
The Objects Update tab appears.
- Configure the behavior of the import, by doing the following:
In the Update Objects from file area, click Manage.
The CSV Objects Process Settings page appears.

- Select the desired options as needed. For details, see Update objects from a CMDB .
Click Save Changes.
A confirmation message appears at the top of the workspace.
- In the Update Objects from file area, do one of the following:
- To manually update objects, do the following:
Click Update Now.
The Update Network Objects dialog is displayed.

- Do one of the following:
- To select a file from the AppViz server (/home/bflow/config/discovery_from_logs), do the following:
- Select From AppViz server.
- In the drop-down menu, select the CSV file.
- To select a CSV file from any location, do the following:
- Select Upload CSV file.
- Click Select a File.
- Select the desired CSV file.
- To select a file from the AppViz server (/home/bflow/config/discovery_from_logs), do the following:
Click Update Now.
The objects are updated, and a success message appears with information about the import.
- To schedule automatic updates, do the following:
Click Edit.
The Schedule Update of Network Objects dialog is displayed.

Complete the fields as needed. For details, see Update objects from a CMDB .
Note: If many files accumulate between scheduled updates and are consequently all imported at once, the oldest file is imported first. Conversely, in the case where the update is configured to delete objects that are not present in the file, objects will only be deleted if they do not appear in any of the files.
- Click Save Changes.
Save the file you want to use for the update to the AppViz server:
/home/bflow/config/objects_update.
The automatic updates are scheduled, and will run off of the file you specified.
- To schedule automatic updates, do the following:
- To manually update objects, do the following:


Import CSV data into AppViz via CLI
To run an import for a CSV file from the CLI:
- Open a terminal.
-
Enter the following command:
where Task is one of the following tasks:
- import_applications. Imports applications and custom application fields to the AppViz database.
- import_contacts. Imports contacts and custom contact fields to the AppViz database.
- import_app_contacts. Imports contacts and their roles to applications.
- import_objects. Imports network objects.
- import_flows. Imports flows definitions to applications.
and, CSVFile is the full path to the CSV file.
The data in the CSV file is imported.