Managing Analyses
This topic describes how to generate and monitor analyses to create unscheduled reports.
Run a manual AFA analysis
The following procedure can be run for a device, group or matrix. The information applies both to manually initiated and scheduled analyses.
By default, when a group or matrix analysis is generated manually, AFA generates a new analysis for each member of the group or matrix, and then also generates a group or matrix analysis.
In addition, you can merge individual reports for members of a group or matrix into a new group or matrix report.
Do the following:
-
In AFA, navigate to the device, group, or matrix for which you want to create the an analysis.
-
In the OVERVIEW tab, click Analyze.
The Analyze dialog is displayed: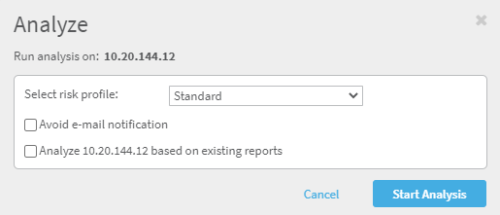
Note: The Analyze dialog varies between devices; not all analyze dialogs are identical to the one shown.
- Specify the Analyze dialog fields as follows:
-
Click Start Analysis to start generating the report. The analysis status is displayed at the top right of the screen.
-
When the analysis is complete, open it by clicking the
 link at the top of the screen, or from the REPORTS tab. For more details, see View the latest report.
| Field | Description / Action |
|---|---|
| Select risk profile |
Select a specific risk profile to use when performing the analysis, or use the default Standard profile. Default: Standard. |
| Avoid e-mail notification |
By default, AFA sends email notifications when an analysis is complete. Select this option to avoid sending emails for this analysis. |
| Analyze [device, group, matrix] based on existing reports |
Relevant only for group or matrix reports. Select to aggregate existing reports from the group or matrix members instead of generating new reports. |
Analysis Status and Related User Actions
The analysis status is shown using the indicator at the top right of the page:
| indication | Purpose |
|---|---|

|
Shows that an analysis is in progress. See View the Progress of an Active Analysis. To abort a currently running analysis. See Abort an analysis. |

|
Shows that the last analysis that was being run was failed. When an analysis fails, AFA provides failure logs. See View Analysis Failure Logs. |

|
Shows that the last analysis run completed successfully. AFA provides a Report AFA reports. During the analysis process, support files are also created and are available if needed. see View Support Files. For a general description of AFA log and configuration files, see Access log and configuration files |

|
An analysis was never run. |
View the Progress of an Active Analysis
When an analysis is in progress, the Analysis indicator shows a spinner. A progress bar is displayed beneath, with a link for viewing status.
Tip: To view details of the analysis's status, you can click View Status or click the  button in the toolbar.
The Analysis Status page is displayed with the 10 most recent analysis jobs, including all currently running analyses.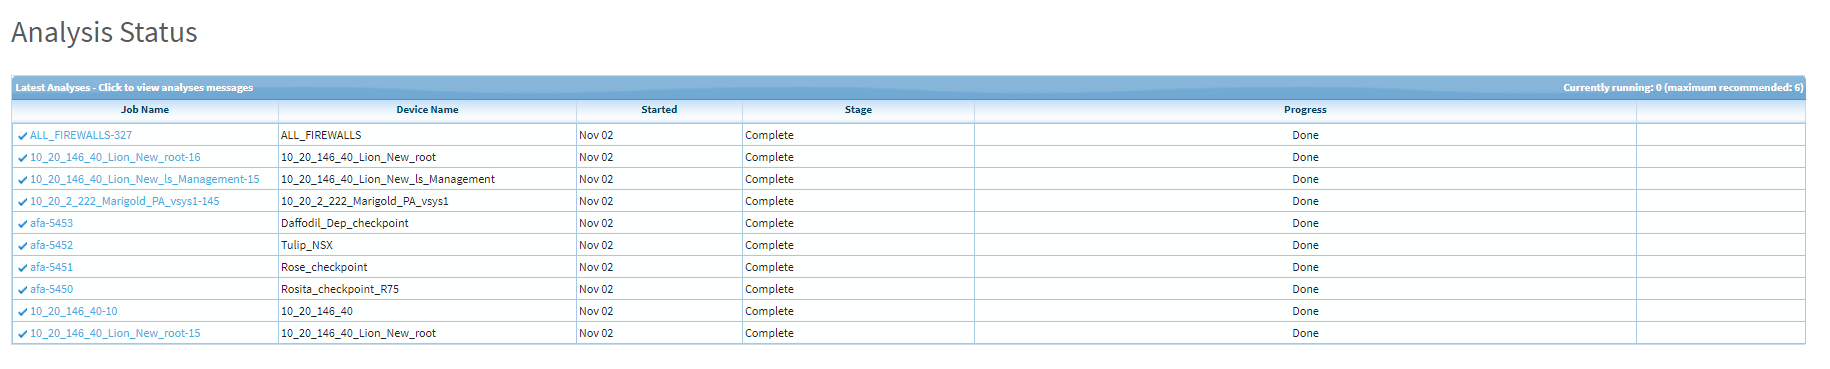
|
Column |
Displays... |
|---|---|
|
Job Name |
The name of the report generated. To view the report, click on the report name. |
|
Device |
The name of the device on which the analysis ran. |
|
Started |
The ASMS host time (when current day) or date when the analysis of a single device started. |
|
Slave (for Distributed systems only) |
The name of the Remote Agent running the analysis. This column only appears if a distributed system is configured. |
|
Stage |
The status of the analysis. This can be any of the following:
|
|
Progress |
For a currently running analysis, this column displays a progress bar and the percentage of the analysis job that has been completed. For a completed analysis, this column displays Done and a linked job name. You can click on the job name to view the home page of the subject device. |
-
Click a Job Name link to open the home page of the subject device.
-
Once the analysis is complete, you can access the generated report. For details, see AFA reports.
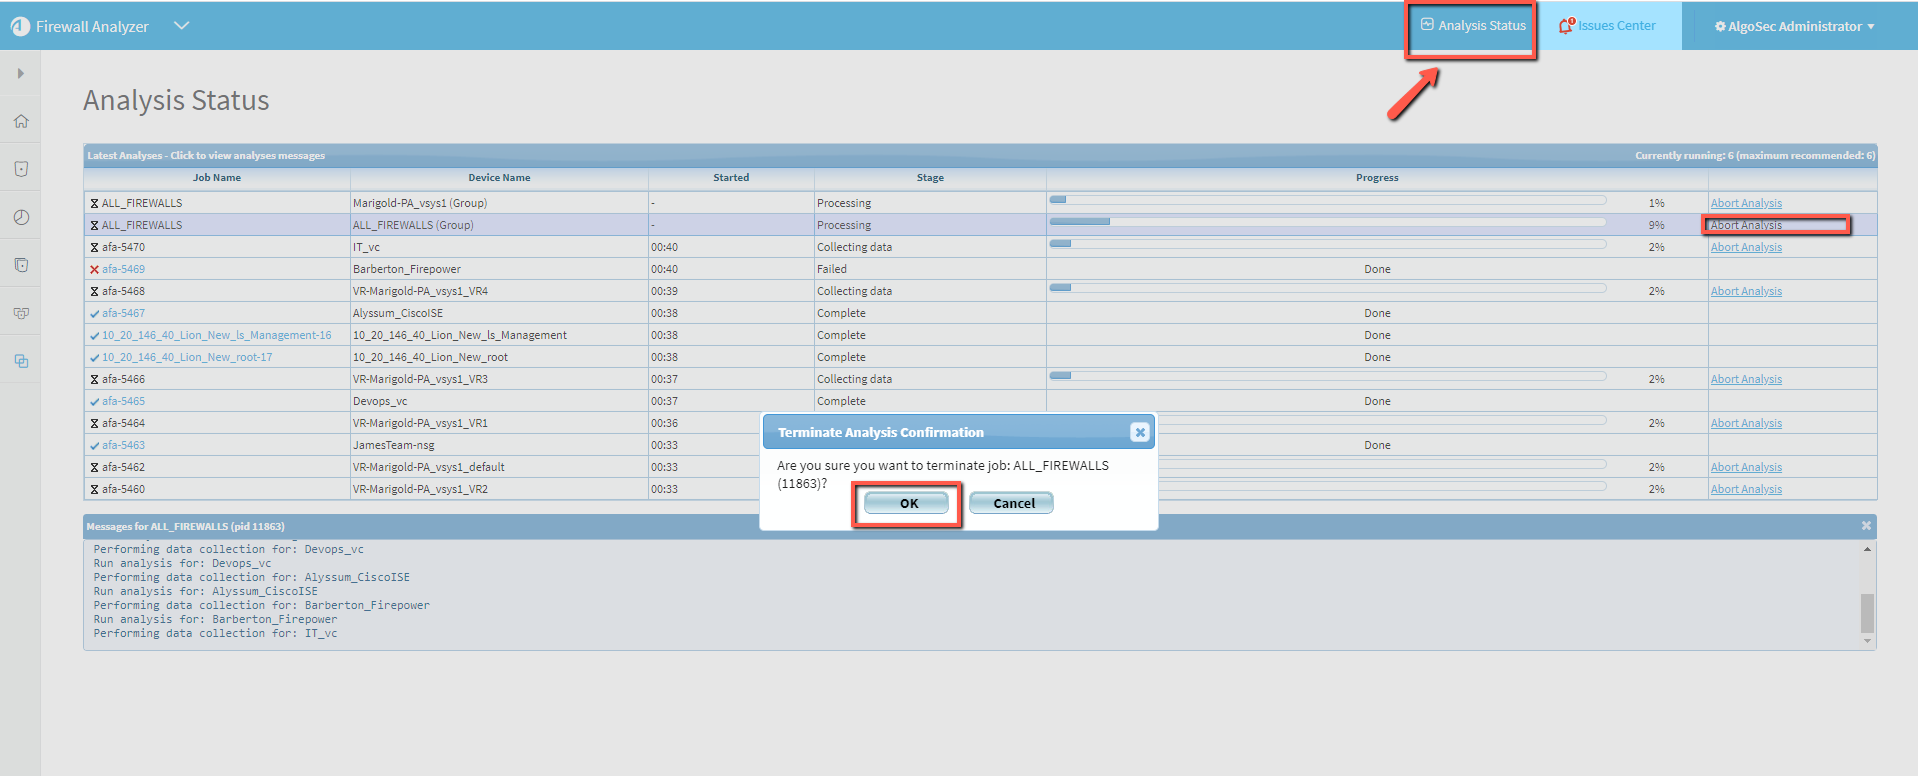
Abort an analysis
An analysis that is running can be stopped by administrators.
-
Open the Analysis Status page by clicking on Analysis Status in the toolbar.
The Analysis Status page is displayed with a table of recent analyses, including all active analyses.
-
At the right of the row of the active analysis to be aborted, click Abort Analysis.
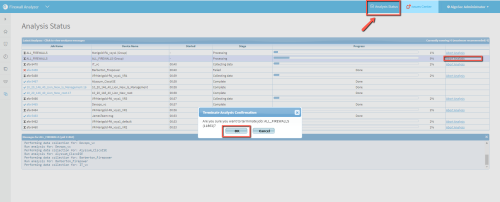
-
On the detailed confirmation message, Click OK to proceed with aborting the analysis.
The analysis stops.
View Analysis Failure Logs
-
Click
at the upper right of the page .A link to report logs appears.
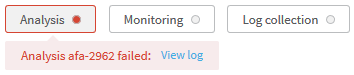
- Click View log .
View Support Files
When AFA successfully completes an analysis, monitoring, or log collection, you can view the support files.
-
Click
,  , or
, or  at the upper right of the page.
A link to the support files is displayed.
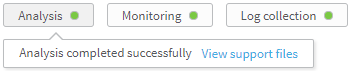
- Click the View support files.