This topic describes how AppViz administrators can configure AppViz applications.
 Decommission an Application: Watch to learn how to decommission a AppViz application.
Manage application expiration
You may set applications to expire on a particular day and notify all users when the expiration will take place using:
- Email notifications: Additional notifications may be different number of days before expiration than first notification.
- GUI Alerts
-
Advance notification - 'Expires in 2 days' is displayed on Dashboard if application is expiring in 2 days.
-
Notice on day of expiration.

- Alert in Activity Log on day of expiration.
To manage application expiration:
- Enable expiration date field in applications. See Enabling Application Expiration (see Enable application expiration).
- Set the desired email notifications.
To set default or custom notification settings for all users and applications, or for a specific user (for administrators, only), see AppViz users, permissions, and roles.
Verify that Application expiration is selected in the Application Events section, otherwise only notification will be in Activity Log on day of expiration.
Enable application expiration
The expiration date field is an optional system field. When enabled, the field appears in application screens along. If an application is set to expire within a short time, alerts are presented on relevant screens.
To enable application expirations:
- Log into AppViz as an administrator.
-
In the toolbar, click your username.
A drop-down list appears.
-
In the drop-down list, select Administration.
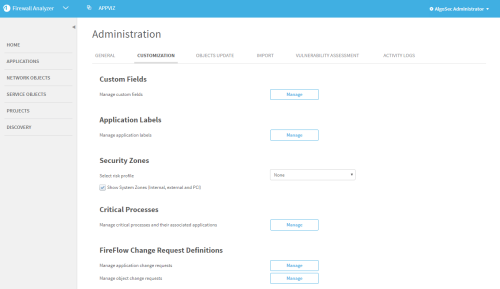
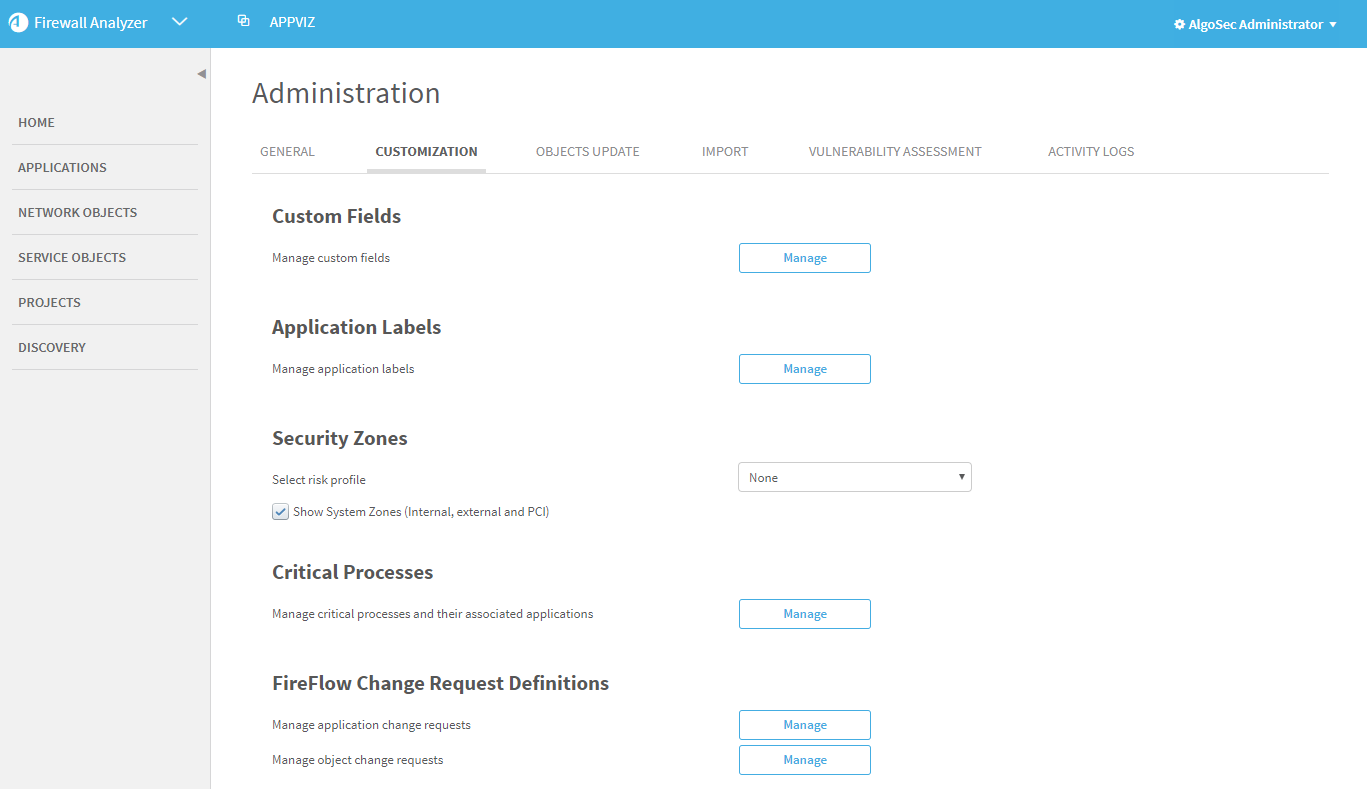
Click the Customization tab.
-
Next to Custom Fields, click Manage.
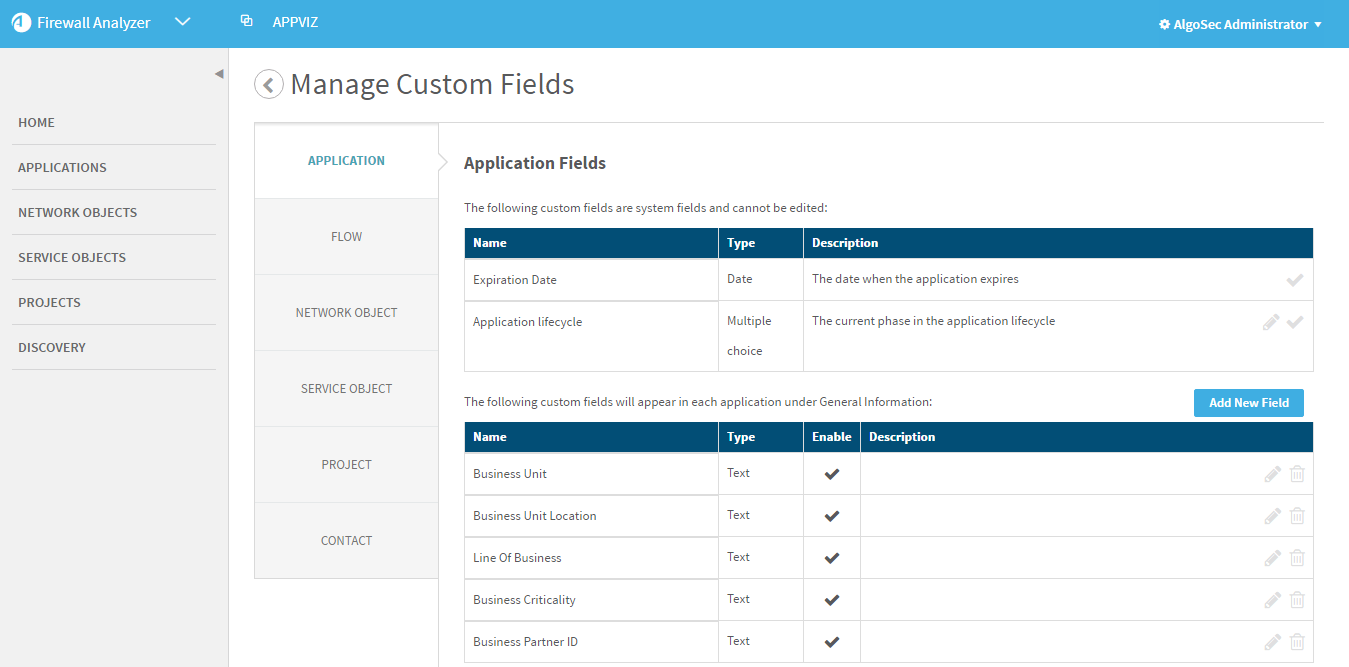
The Manage Custom Fields page appears with the Application fields area open.
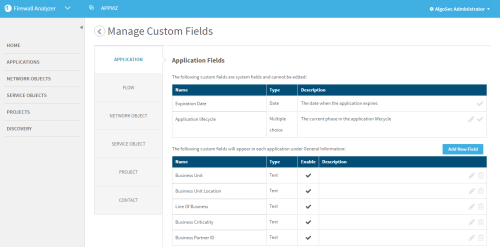
- Enabled fields are marked with
 .
. - Disabled fields are marked with
 .
.
- Enabled fields are marked with
-
To enable the Expiration Date field, on the right side, click
.The Enable field confirmation dialog is displayed.

- Click OK to enable.
-
To disable the field and remove it from all applications, click
.The Disable field confirmation dialog is displayed.

- Click OK to disable.


Manage application tags
AppViz provides two different types of application tags:
- User-defined tags. Basic tags that can be created and added to any application as a way of organizing applications in groups.
- System tags. tags that are automatically assigned to an application as the result of a system function. Applications with system tags include critical process applications and PCI applications.
User-define tags can be managed with the following actions:
- Add. Create a tag and optionally assign it to one or more applications. See Adding a tag (see Add a tag ).
- Edit. Modify the name of a tag and the assigned applications. See Editing a tag (see Edit a tag ).
- Replace. Replace a tag (for all applications assigned to the tag) with a different existing tag. See Replacing a tag (see Replace a tag )
- Delete. Delete a tag from the system and all its associations with applications. See Deleting a tag (see Delete a tag ).
The PCI tag can be edited by modifying the applications assigned to it. See Customizing Applications Assigned to the PCI tag (see Customize applications assigned to the PCI tag ).
Critical Process tags are managed in the critical process manager. For details, see Critical processes.
Note: Only users with administrative permission can manage application tags. In order to allow users without administrative permissions to create new tags while managing applications, see AppViz users, permissions, and roles. All users can search for applications by tag by performing an advanced or simple search in the Application area menu.
Add a tag
To add a tag :
-
In the toolbar, click your username.
A drop-down list appears.
- In the drop-down list, select Administration.
-
Click the Customization tab.
-
In the Application tags area, click Manage.
The Manage Application tags page appears.
-
Click Add tag.
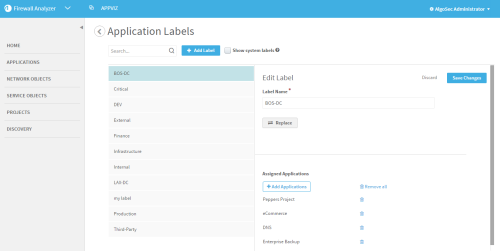
The New tag area appears.

- In the tag Name field, type the name of the tag.
- To assign applications to the tag, do the following:
Click +Add Applications.
The Add Applications wizard opens.
Select applications using the information in Using the Add Applications Wizard (see Use the Add Applications wizard).
The selected applications are added to the list.
- To revoke the tag from an application, click
 next to the application's name in the Assigned Applications area.
 - Click Save Changes.


Edit a tag
To edit tags:
-
In the toolbar, click your username.
A drop-down list appears.
- In the drop-down list, select Administration.
- Click the Customization tab.
-
In the Application tags area, click Manage.
The Manage Application tags page appears.
- Do one of the following:
- Select the tag in the list.
- Search for the desired tag by doing the following:
- In the search box, type part of the tag name.
- Click
 .
. Select the tag in the results list.
The tag appears with its list of associated applications.
- To edit the tag's name, type the new name in the tag Name field.
- To assign applications to the tag, do the following:
Click +Add Applications.
The Add Applications wizard opens.
Select applications using the information in Using the Add Applications Wizard (see Use the Add Applications wizard).
The selected applications are added to the list.
-
To revoke the tag from an application, click
next to the application's name in the Assigned Applications area. The tag is removed from the selected application without confirmation.
- Click Save Changes.
Replace a tag
To replace a tag:
-
In the toolbar, click your username.
A drop-down list appears.
- In the drop-down list, select Administration.
- Click the Customization tab.
-
In the Application tags area, click Manage.
The Manage Application tags page appears.
- Do one of the following:
- Select the tag in the list.
- Search for the desired tag by doing the following:
- In the search box, type part of the tag name.
- Click .
Select the tag in the results list.
The tag appears with its list of associated applications.
-
Click
 .
.The Replace tag dialog box opens.
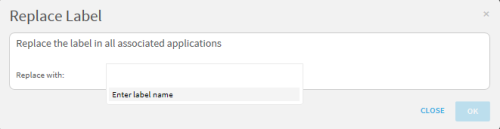
- In the Replace with field, start typing the existing tag name, and select the tag from the drop-down list.
-
Click OK.
The tag name is replaced in each assigned application.

Delete a tag
To delete a tag:
-
In the toolbar, click your username.
A drop-down list appears.
- In the drop-down list, select Administration.
- Click the Customization tab.
-
In the Application tags area, click Manage.
The Manage Application tags page appears, with a list of tags on the left.
-
In the list of tags, hover over the desired tag and click
. A confirmation message appears.
- Click OK.
Customize applications assigned to the PCI tag
All applications that include a network object that intersects the PCI zone are automatically assigned to the PCI system tag. If desired, you can manually un-assign applications you do not want to be associated with the tag. Un-assigning an application does nothing to affect its traffic flows; its network object(s) will still intersect the PCI zone, but the PCI tag will not appear on the application's dashboard. Unassigned applications will not appear as PCI applications in the AFA PCI regulatory compliance report.
Note: The PCI zone is specified in AFA.
To customize applications assigned to the PCI tag:
-
In the toolbar, click your username.
A drop-down list appears.
- In the drop-down list, select Administration.
- Click the Customization tab.
-
In the Application tags area, click Manage.
The Manage Application tags page appears, displaying all user-defined tags.
-
Select the Show system tags check box.
All existing system tags appear at the top of the list.
-
Select the system tag with the name PCI.
The tag appears with its list of associated applications in the Assigned Applications list. All applications with an object that intersects the PCI zone are assigned to the tag by default.
- To un-assign an application, click Un-assign next to the desired application.
-
To assign an application, click Assign next to the desired application.
Only applications that you previously un-assigned appear as options.
- Click Save Changes.
Manage application and user awareness
ASMS enhances security visibility by supporting the integration of user and application traffic information from various devices. Specifically, ASMS supports the:
-
User traffic field for Panorama, and FortiManager devices
-
Application traffic fields for Panorama and Cisco Firepower devices.
Note: This integration is facilitated through FireFlow, where application and user awareness features can be enabled. To enable application and user awareness in FireFlow, see Traffic field parameters.
ASMS supports the User and Application traffic fields. When a Palo Alto Networks or Check Point device is defined in AFA, user and network application awareness is automatically enabled in AppViz. Both these fields will appear wherever traffic fields appear and will be considered in all traffic simulation queries, such as connectivity checks. If desired, you can manually enable or disable user and network application awareness in AppViz.
Once application and user awareness is/are enabled in FireFlow, the associated traffic fields are available in AppViz where you can opt to set them to be visible or hidden.
Important Considerations:
-
LDAP Authentication Server: To enable validation for the user field when utilizing an LDAP authentication server, see Enable validation for the user field .
-
Usage Without FireFlow: Application and user awareness features are not available when AppViz is used independently of FireFlow.
Steps to configure Awareness Settings:
Do the following:
-
Enable user and network application awareness in FireFlow. See Traffic field parameters.
-
In the toolbar, click your username.
A drop-down list appears.
-
In the drop-down list, select Administration.
The Administration page appears in the workspace.
-
Click Customization.
The Customization tab appears.
-
For application awareness:
-
Click Show in the Application Awareness Support area to enable visibility.
-
• Click Hide to disable visibility.
-
-
For user awareness:
-
Click Show in the User Awareness Support area to enable visibility.
-
Click Hide to disable visibility.
-
Enable validation for the user field
By default, the value of the User field is not validated. If ASMS is fetching data from an LDAP authentication server (enabled in AFA), and user awareness is enabled in AppViz, you can manually enable or disable validation of the User field in AppViz.
Note:
This procedure is only relevant when User Awareness Support is enabled for AppViz and fetching data from an LDAP is enabled in AlgoSec Firewall Analyzer. For more details, see Manage application and user awareness
To enable validation for the user field:
-
In the toolbar, click your username.
A drop-down list appears.
-
In the drop-down list, select Administration.
The Administration page appears in the workspace.
-
Click Customization.
The Customization tab appears.
-
Do one of the following:
- To enable validation for the User field, in the User Awareness Support area, next to User validation via LDAP is currently turned off, click Turn On.
- To disable validation for the User field, in the User Awareness Support area, next to User validation via LDAP is currently on, click Turn Off.